Used Car Inspection Worksheet
This used car inspection worksheet is provided as a courtesy for site visitors.
Use your browser print functions to generate a single copy for your own personal use.
Update: I added a link to a printer friendly PDF version at the bottom for easy printing. However, in order to make it fit on three pages I condensed the information.
Therefore, read through this page and take the condensed version to the inspection.
We ask you to share this page with friends and family with the social sharing buttons on the side and at the bottom of the page on mobile devices.
If you are a website owner and wish to share this with your visitors we ask for a link to this page or the FixMyOldRide.com home page.
Don't forget to read this next article if you're looking for a dependable first or quality used car.
 Shopping for a Used Car?
Used Car Inspection Check List
Important Paper Work
- Original factory issued owner’s manual.
- Separate owner guides for any accessories (Example: Navigation).
- Are the repair and maintenance records available?
- Private seller has a valid title and registration with matching vehicle Identification numbers.
Inspect the Outside of the Automobile
- Check windshield for rock chips (stars) and cracks.
- Do the body panel colors match? Check for overspray on weather stripping and flat black trim around glass components.
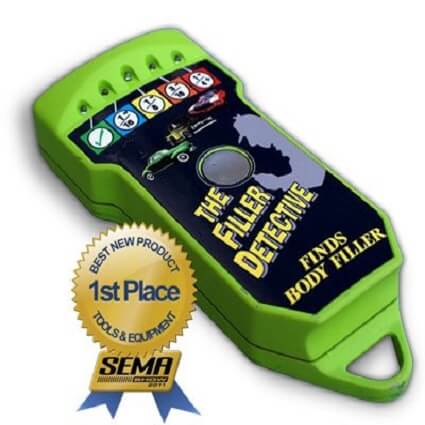
- Will a magnet stick to the surface of suspicious looking steel body panels? Use a strong magnet and a piece of paper to protect the paint finish. The magnet will not stick to body filler repaired areas.
- Is this a new (not factory) paint finish? If yes, it could be trouble down the road.
- Inspect the body seams and check the trunk and hood for alignment.
- Are the body lines for the doors and fenders properly aligned?
- Count the scratches in the paint finish and note the depth (repairable or not?).
- Check for and record the dings and body dents.
- Do the windshield wipers and blades function?
- Verify the fog lights, backup lamps, headlights, brake lights and turn signals are in working order.
The Detailed Interior Inspection Process
- Inspect the driver’s seat condition, brake pedal pad and carpet wear near the gas pedal. These high wear areas should be consistent with the odometer reading.
- Check that the trunk, hood and doors open and close properly.
- Is there a heavy scent of cover up air freshener? This might indicate a water leak or flood damaged automobile.
- Key
on engine off dashboard bulb check lights and gauges work. The bulb check function assures someone didn't remove the bulb to cover up a problem.
- No warning lights remain on after the engine is started. Example: check engine light or reduced engine power light.
- Entertainment, navigation and stereo systems work properly.
- Verify the heater blows warm air from the floor vent position with the engine at operating temperature.
- Check that the car air conditioner blows cool air at 55 degrees or less from the center vent with the low blower fan speed selected. Results will vary slightly with weather conditions.
- Windshield wipers and time delay function operate as intended.
- Test the windshield washer fluid dispenses properly.
- Verify all seats are equipped with functioning seat belts. Verify the air bag light comes on and then goes off when the engine is first started.
- Make sure all power and manual seats adjust properly.
- Check the power window operation from all switches not just the master switch.
- Verify the sunroof opens and closes properly and check for signs of water leaks.
- Trunk locks and unlocks with keys and remote release switches. All doors lock and unlock with the keys, remote control fobs and push button switches.
- Do the hazard warning lights function properly.
- Operate the turn signals and headlights, including the high beams.
Checking all Four Tires and the Emergency Spare
- It would be nice if all the tires were the same make and model. If they aren't make sure they match the factory size
and speed rating found on the driver side door jamb label. Previous owners might install cheap tires before selling the automobile.
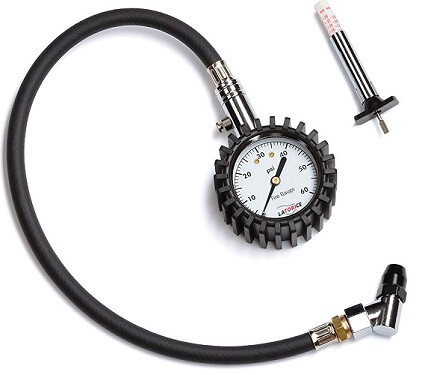
- Verify the tires are free of any sidewall cuts, bubbles or cracks from dry rot and have at least 4/32 of tread depth remaining.
- Is the tread flat and worn evenly? Uneven or choppy wear could mean alignment and suspension problems.
- Pull out and double check the spare
tire, jack and lug wrench to make sure they are fully functional. You don't want to find out they don't work when you have a blow out.
- Is the Spare tire fully inflated? Emergency spares are often inflated to 60 PSI or more. Check the sidewall of the doughnut spare for the inflation specification.
Complete Engine Compartment Used Car Inspection
- Check for proper fluid levels and then for automotive fluids or oil leaking.
- Inspect the oil filler neck and the underside of the fill cap for thick milky deposits. This could indicate an internal coolant leak from a failed head gasket or intake manifold seal.
- Verify proper battery maintenance with terminals free of corrosion. Check the date of the battery installation. A good quality battery of the proper size will last for about five years.
- Look at the oil dip stick for thick dark oil. This could indicate a lack of engine maintenance or additives installed to cover up problems.
- Listen for unusual noise or odors while the engine is running.
- Make sure the exhaust emissions are not blue (indicates burning oil) or heavy white smoke could indicate steam from water in the combustion chamber. Check for black soot around the tailpipe and the bumper above it. This could indicate excessive oil consumption or fuel system issues.
Road Test for Automatic Transmission Problems
- First look at the automatic transmission fluid on the dipstick (if applicable). Does it look clean, not dirty or feel gritty? Hold it up to the light; does it have metal particles suspended in the fluid? This might indicate a possible internal transmission problem.
- On the road test look for transmission slippage or flair up (slip) between shifts. Check for delays when shifting into drive or reverse. This could indicate leaking internal seals or poor front pump pressure. A loud clunk noise when shifting could indicate broken engine or transmission mounts.
Clutch and Manual Transmission Inspection
- Check clutch engagement for smooth take off and signs of a worn clutch (late engagement). Clutch chatter when letting out the clutch can signal an engine rear main seal leak onto the flywheel. Make sure each gear shifts smoothly and is no noisier than the other gears while driving.
- Listen for throw out bearing noise. Check with the car in neutral while engaging and releasing the clutch pedal (should sound the same). Don’t forget to check the reverse gear.
Inspection for Used Car Steering and Suspension Problems
- Inspect the vehicle ride height. Compare measurements from the center of each wheel well. Different measurements from left to right could indicate sagging or worn springs.
- Try a rebound test by pushing down on the automobile in each corner. It should rise and then settle. Make sure there are no creaking noises from bushing or ball joint problems.
- Do all four corners respond the same way when bouncing?
- Road test the car to check for drifting to one side (alignment issues). Check for low speed wobble in the steering wheel that could indicate a bent rim or tire problem.
- At highway speeds is the automobile stable and responsive? Check for shaking or vibration at highway speeds (wheel balance).
- No resistance or noise in the steering wheel when turning the vehicle at low speeds and parallel parking.
- No clicking or clunking when moving the vehicle from a stop with the wheels turned. This checks the CV joints.
Automotive Braking System Inspection and Road Test
- Does the vehicle stay generally straight when applying the brakes? If it pulls to one side or the other there could be a binding brake caliper issue.
- Check that the parking brake engages and holds the vehicle firmly. Also make sure it disengages properly and doesn’t drag after releasing.
- On a road test be on the lookout for squealing or grinding noises when applying the brakes. Also verify no pulsation or up and down movement from the brake pedal when stopping.
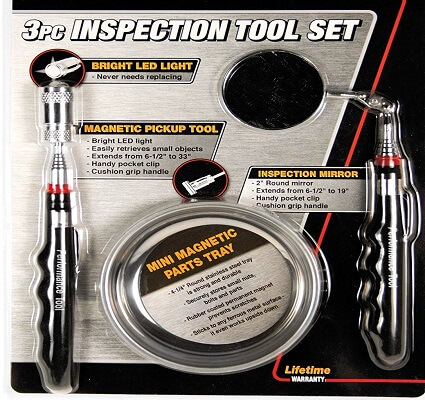
- If possible shine a flashlight through the wheels and use an inspection mirror to see how much brake pad remains. Also look for disc rotor problems. Deep groves in the rotor face could indicate worn-out brake pads. Bluish or purple glazed rotors could indicate caliper problems or driver abuse from extreme braking maneuvers.
Full Frame and Sub Frame Used Car Inspection Procedure
- Check under the hood for front collision damage. Look for signs of repair and repainting including over spray on engine system components like coolant hoses and wiring harnesses. Look for unpainted bolts on fenders and spot welds that look different then the clean factory robot welds.
- Look for signs of crumpling, distortion or straightening inside the trunk and under the hood. Keep an eye out for areas of seam sealer without factory paint.
- Inspect the front and rear bumpers, mounting holes and hardware for collision damage. Pay particular attention to where they attach at the frame or sub frame.
- Since detecting frame damage is so important you might want to see what the CarFax people have to say on the subject.
Here's the printer friendly version of the Used Automobile Inspection Checklist.
Take a minute and see the other articles related to upgrading your old ride. Learn when it's time to cut and run from that tired old car before you spend more than it's worth.
Author bio : Mark is a retired ASE certified master technician, Chevrolet Professional Service Council member and the founder of FixMyOldRide.com. Watch the video on the about Mark the mechanic page to see his credentials. Mark hand writes all of the articles on FixMyOldRide.com unless indicated otherwise.


