Camshaft Position Actuator Solenoid
Car makers use the cam position actuator solenoid valve to adjust the engine timing on the fly.
This precise control allows engine designers to squeeze more power and fuel economy out of the engine while maintaining strict emissions standards.
However, some of these camshaft actuators aren’t holding up over time. This page concentrates on the three popular models of General Motors four-cylinder engines that use solenoid valves to control camshaft timing.
Quick Link: New VVT Intake & Exhaust Camshaft Position Actuator Solenoid Valve Kit for Chevy and Buick 2.0L, 2.2L and 2.4L.
First we'll get into the importance of the code number as it relates to failure on the intake or exhaust side.
At the end of the article review the simple repair procedure with a few important tech tips thrown in.
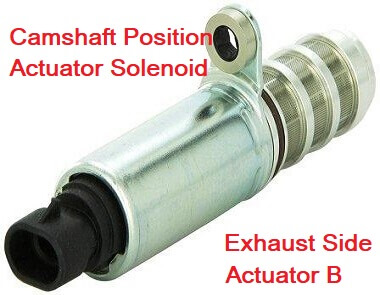
 Camshaft Position Actuator Solenoid
Camshaft Position Actuator Solenoid Valve Codes
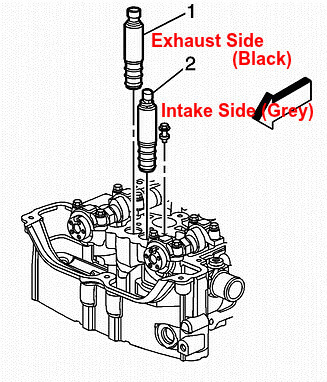
General Motors labels the intake side actuator solenoid as valve A. this part has a gray connector top. When the intake side camshaft position actuator fails, it sets a code P0010 that stands for
Bank one circuit malfunction. You can also set a code P0011 actuator A over advancing the timing. If you set a check engine light code P0013 this stands for camshaft position actuator solenoid valve B.
This is a circuit malfunction on the exhaust side. The exhaust actuator has a black colored connector top. You can also set a code P0014 for the actuator valve over advancing the camshaft timing.
Normally I would tell you to break out the voltmeter and start performing some tests before you replace an output computer sensor. However, enough of these components have failed where I'll bypass arduous diagnosis and just install new parts.
Nevertheless, make sure you get the right parts for your year, make and model. However, the most important factors remain the engine size and which camshaft position actuator solenoid valve you’re replacing.
The parts listed here come in a few bucks cheaper than you’ll find at the dealership. This is why I’ll make a case for replacing both of the solenoids at the same time.
Even if you've only set a code P0110 chances are the exhaust cam position actuator solenoid valve is probably not too far behind in failing also. You don't have to worry about buying the wrong one when replacing both at the same time.
 Camshaft Position Actuator Location
General Motors installed these camshaft control solenoids on all of their four-cylinder engines from 2004 through the 2013 model year.
At this point they had enough data and failed components to realize they needed to regroup and update the replacement parts.
The original assigned General Motors part number for the exhaust side solenoid actuator valve is 12655421. The GM part number for the intake side actuator assembly shows as 12655420 in the parts book. Rest assured that any part you get now enjoys the enhanced, longer lasting design.
Cam Position Actuator Valve Diagram
 Camshaft Actuator Diagram
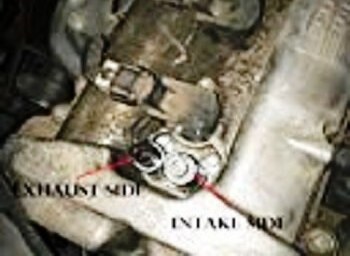
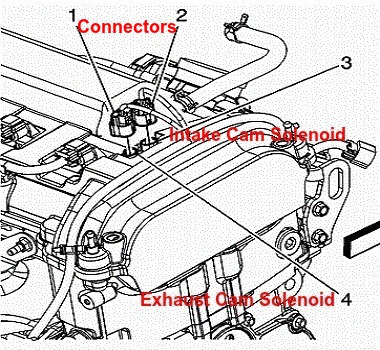
I've posted some camshaft position actuator valve diagrams on this page to help you locate the individual components.
With that said, if you follow my advice above and below you'll go ahead and replace both at the same time, so that the actual position of the parts isn't important.
However, what remains important is replacing the gray top intake actuator with the correct replacement part.
For this reason I recommend doing them one at a time. First, you replace the black top exhaust position valve and when that's completed and reconnected move on to the intake side.
Repair Procedure for Cam Actuator Valve Replacement
I've watched a few videos of other people replacing these camshaft position actuator solenoid valves. These mechanics are skipping a few easy steps that I'm recommending.
The first step begins with removing the intake manifold cover. You’ll have to disconnect the mass airflow sensor so you can set the cover aside and out of the way.
With the cover removed you can see both of the actuators located in the valley of the valve cover. This area collects a lot of dirt and more importantly sand particles. Before you start removing the sensors use compressed air to blow the dirt, dust and debris out of the valley.
 GM Cam Solenoid Diagram
Don’t skip this important step. You can even use a can of the stuff you use for cleaning computer keyboards to clear the area. You must prevent this grit from finding its way into the camshaft area.
Next there’s a trick to disconnecting the electrical connector from each camshaft position actuator solenoid. First you have to pull up on the lock tab so that you can push on the release button and then wiggle the connector free from the actuator.
Note that on the intake side that this lock tab is a different color and easy to see. You can use a small pick set to lift up on the tab and release the lock.
The important thing to remember is these plastic connectors are now more than 10 years old and very brittle. Failure to take your time with this connection can break the connector and change the ease of your repair procedure.
Additional Cam Actuator Repair Tips
On some of the YouTube videos I've seen the mechanic impresses us by using air tools or cordless screwdrivers to remove and reinstall the retaining bolts. I recommend using hand tools for this procedure.
Also note that in the service manual the torque of the retaining bolt comes in at only 89 inch pounds.
Remember, they make the threads from a soft aluminum material. There’s no reason to crush the retaining bolt beyond this specification.
Here’s another step I see people skipping. They take the camshaft position actuator solenoid right out of the box and slide it into position.
The replacement part has an O-ring on it. Lubricate this O-ring with some fresh engine oil. The lubrication makes the O-ring more resistance to nicking as it slides into place.
Chevrolet Cam Solenoid Updates
I used to believe in just replacing the timing control solenoid currently experiencing the malfunction.
Although I'm a firm believer in only replacing failed components in this situation I had to adjust my thinking for the sake of my customers.
If I replace the intake side solenoid and the customer has to come back in a week for the exhaust side then I really didn’t save my customer any money.
My point being, in the case of a failed Chevrolet cam solenoid you should probably go for replacing the pair at the same time.
Thankfully, the prices continue to come down on the replacement parts. In fact, a pair of Chevrolet cam sensors goes for less than $40. This trend should continue as demand remains high.
If you own a Chevrolet V6 powered car then you might want to learn more about the defective MAP sensor issue. See what else we cover here on the Fix My Old Ride website.
Author bio : Mark is a retired ASE certified master technician, Chevrolet Professional Service Council member and the founder of FixMyOldRide.com. Watch the video on the about Mark the mechanic page to see his credentials. Mark hand writes all of the articles on FixMyOldRide.com unless indicated otherwise.